gluten free

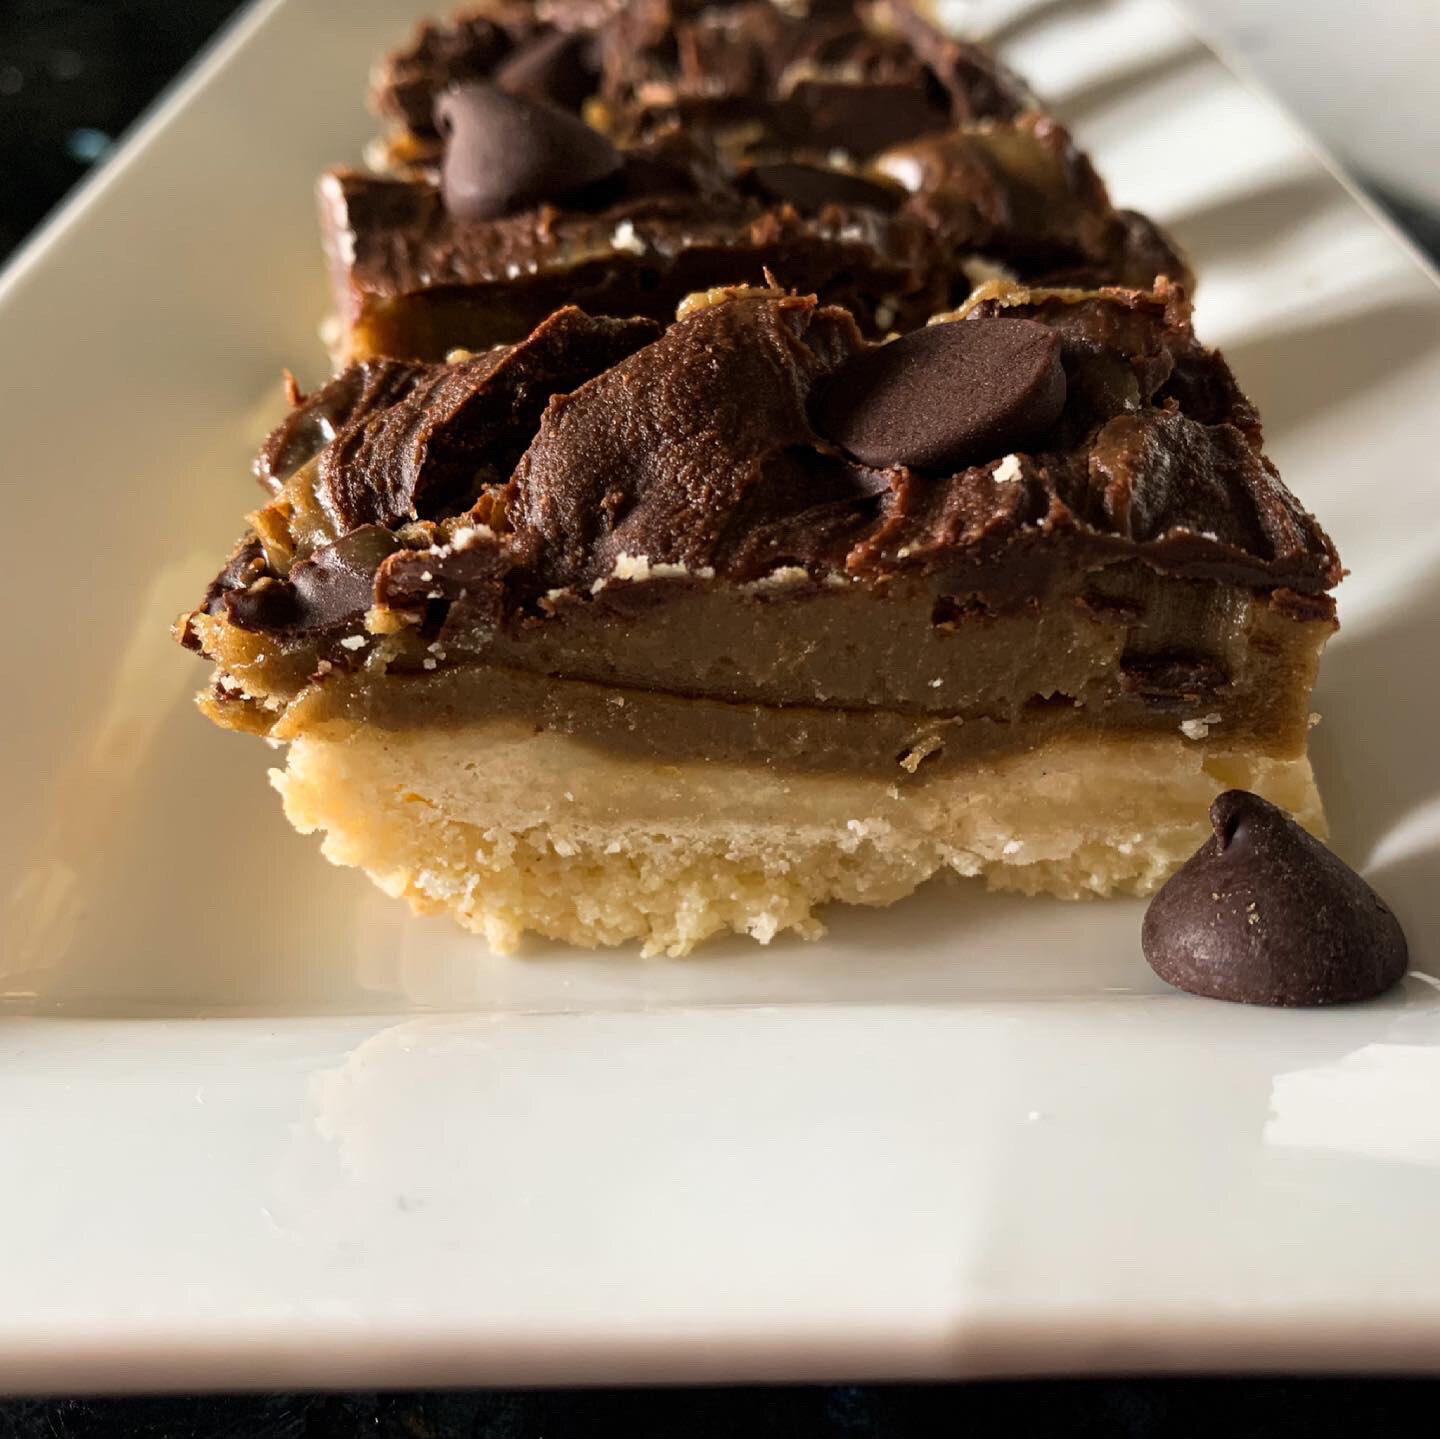
Shortbread Dreamy Bars

Eating healthy is all about balance and everyone needs a chocolate treat from time to time! These shortbread bars are served chilled and are perfect for hot summer days.

And thanks to one of my friends and instagram followers for the recipe name suggestion! If you are on instagram, you can find me @mollymorganrd.

Note: These are gluten-free and can be made nut-free and vegan, depending on some of your ingredient selections.

Shortbread Dreamy Bars (Image: Molly Morgan)

Shortbread Dreamy Bars (Image: Molly Morgan)

Shortbread Dreamy Bars
Serves 8 (full bars) - 16 (half bars)

Base Ingredients:
1/2 cup melted Earth Balance spread
1 cup Bob’s Red Mill 1:1 gluten-free flour
1/3 cup confectioners sugar
1 tablespoon corn starch
1/2 teaspoon salt
1 teaspoon vanilla

Creamy Topping - Ingredients:
2 tablespoons Earths Balance spread, melted
1/2 cup sunflower nut butter or peanut butter
1/3 cup maple syrup
1 teaspoon vanilla
1/4 teaspoon salt

Chocolate Topping - Ingredients:
1/2 cup dark chocolate chips, melted*
dark chocolate chips to garnish

*Or choose chocolate of choice

Directions:
1. Preheat oven to 350 degrees F. Line a loaf pan with parchment paper.
2. In a small mixing bowl combine the base ingredients: melted spread, flour, confectioners sugar, cornstarch, vanilla, and salt. Spread mixture evenly in prepared pan. Bake for 15 - 20 minutes, until lightly browned.
3. In a mixing bowl, combine the creamy topping ingredients: melted butter, sunflower butter or peanut butter, maple syrup, vanilla, and salt. Stir to combine. Spread the mixture evenly over the base.
4. In a small bowl, place the dark chocolate chips, and microwave to melt. Then spread gently over the topping and finish by placing dark chocolate chips on the top.
5. Refrigerate for 2 hours (or more). Lift from the pan using the parchment and slice into 8 bars and then cut each bar in half. Store in an air-tight container in the refrigerator.

Tip: These taste great cut into bitesize pieces with your favorite vanilla ice cream or coconut ice cream.

Print Friendly and PDF

PB Chip Cookie Dough Easter Egg Bites

PB Chip Cookie Dough Easter Egg Bites (Image: Molly Morgan)

PB Chip Cookie Dough Easter Egg Bites (Image: Molly Morgan)

PB Chip Cookie Dough Easter Egg Bites
Serves 18

Ingredients:
3/4 cup coconut flour
1/4 cup gluten-free 1:1 baking flour
1/2 cup maple syrup
1 cup creamy peanut butter
1 teaspoon vanilla
1/4 teaspoon salt
1 teaspoon coconut oil
1 1/2 cups chocolate chips, divided

Directions:
1. In a 350 degree oven, bake the gluten-free 1:1 baking flour for 12 to 15 minutes. Remove from oven and let cool.

2. In a mixing bowl combine coconut flour, baked gluten-free flour, maple syrup, creamy peanut butter, vanilla, and salt. Once combined, stir in 1 cup of the chocolate chips. Using your (clean) hands, shape mixture into egg-shaped pieces and place on parchment lined baking sheet. The dough will make about 18 egg-shaped pieces that are about 1.5-inches in size and about 1/2-inch thick.

3. Refrigerate shaped ‘eggs’ for 30 minutes.

4. Microwave the remaining 1 cup of the chocolate chips with the coconut oil. Microwave in 30 second intervals, stir and then repeat, until chocolate is melted and smooth.

5. Carefully dip each cookie dough ‘egg’ into the melted chocolate. OR alternately, using a fork drizzle chocolate over the eggs. Place on the parchment lined baking sheet. Refrigerate for 30 minutes or until chocolate is hardened. Transfer to storage container, cover and refrigerate until serving.

Print Friendly and PDF

Chocolate Chip Cookie Bar

Healthy eating is all about balance so why not celebrate National Cookie Day? This is a go-to chocolate chip cookie bars recipe that we love ot make, they are so delicious! And they even are gluten free.

You could swap out the gluten free flour for whole wheat pastry flour instead if you rather. As far as flour suggestions, we love Bob’s Red Mill 1:1 Gluten Free Baking flour or Bob’s Red Mill Whole Wheat Pastry Flour. Report back if you make the recipe! HAPPY NATIONAL COOKIE DAY!

Chocolate Chip Cookie Bars (Image Source: iStock)

Chocolate Chip Cookie Bars (Image Source: iStock)

Gluten Free Chocolate Chip Cookie Bars

Serves 20


Ingredients:
2 ¼ cups gluten-free baking flour
1 teaspoon baking soda
1 teaspoon salt
1 cup butter, softened
¾ cup granulated sugar
¾ cup brown sugar
1 teaspoon vanilla extract (gluten-free)
2 eggs
1 package chocolate chips (gluten-free)


Directions:

1.       Preheat the oven to 375 degrees F.

2.       Prepare a 9” x 13” pan with non-stick cooking spray.

3.       In a small bowl combine the flour, baking soda, salt, and vanilla.

4.       In a mixing bowl combine the butter, sugars, and vanilla. Beat with mixer to combine. Add-in the 2 eggs and whip with mixer to combine.

5.       Stir in the chocolate chips.

6.       Transfer the batter (it will be thick) to the prepared ban.

7.       Bake for 20 – 25 minutes until the top is golden brown.

Print Friendly and PDF

Recipe: Everything Crackers

These crackers are so delicious and easy to make! They are crispy and full of flavor. Plus if you’re into eating keto, gluten-free, or grain-free, these are definitely for you.

Everying Crackers - Image Source: Molly Morgan

Everying Crackers - Image Source: Molly Morgan

Everything Crackers
10 servings

Ingredients:

1 1/2 cups superfine almond flour, divided
2 cups shredded mozzarella cheese
1 egg
1/4 cup everything bagel seasoning

Directions:

Everything Crackers Preparation - Photo credit: Larry Morgan

Everything Crackers Preparation - Photo credit: Larry Morgan

  1. Preheat the oven to 425 degrees F.

  2. In a microwave safe mixing bowl combine 1 cup of almond flour and the mozzarella cheese.

  3. Microwave for 1 minute then remove and stir. If needed microwave again in 30-second increments until the mixture is easy to stir and starts to form a soft dough. Continue to mix thoroughly. Set aside and let cool, about 10 minutes.

  4. Stir in the egg and mix well. If needed, stir in some of the extra almond flour, dough should be soft but not sticky.

  5. Working in batches, sprinkle some of the remaining almond flour on parchment paper. Then transfer part of the “dough” to a piece of parchment paper.

  6. Sprinkle the top of the dough with some additional almond flour to prevent sticking. Roll the dough into a thin sheet. Then shake the everything bagel seasoning generously over the top of the dough.

  7. Cut into about 1-inch squares using a pizza cutter. Then transfer the squares to a baking sheet.

  8. Bake for 5 minutes, then remove and carefully flip the crackers. Bake for 5 - 7 minutes more until the crackers are crispy and browned.

  9. Remove and serve! Store extra crackers once cooled, in an air-tight container.

Print Friendly and PDF

Coconut Chip Banana Bread

When it comes to making gluten-free and lower carb breads, coconut flour is a great go-to; it has a delicious flavor and still gives the bread a somewhat 'bread-like' texture. This bread adds in coconut oil for moisture - the result: a soft and delicious gluten-free banana bread. 


Coconut Chip Banana Bread

Serves 16

Ingredients:

1 cup coconut flour
1 cup gluten-free oats
3 large bananas, mashed
3 teaspoons baking powder
1/4 teaspoon salt
1/2 cup coconut sugar (or brown sugar)
1/2 cup chocolate chips
2 eggs
1/2 cup milk or almond milk
1 teaspoon vanilla extract or pure vanilla
1/2 cup coconut oil

Directions:

Preheat the oven to 350 degrees F. Prepare a bread pan with butter or parchment paper.

In a mixing bowl combine the flour, oats, mashed bananas, baking powder, salt, and coconut sugar. Stir to combine. 

Then stir in the eggs, milk, vanilla, and coconut oil. Stir to combine again, the mixture will be thick. Then stir the chocolate chips into the mixture.

Bake for 60 minutes or until the bread is golden on top and a toothpick comes out clean.

Nutrition Facts (per serving): 190 calories, 9 grams fat, 7 grams saturated fat, 0 grams trans fat, 0 milligrams cholesterol, 180 milligrams sodium, 23 grams carbs, 5 grams fiber, 10 grams sugar, 4 grams protein

Print Friendly and PDF

Cheesy Veggie Sticks

I'm on a continual quest to work in more vegetables into our eating routine and these cheesy veggie sticks are my newest favorite! You could almost call them bread sticks although there is now flour or wheat in them - just veggies, egg, cheese, and spices.  The other bonus is that they are quick and easy to make. Here is how this comes together and the recipe is listed below!

First start with cauliflower that is pulsed to about the size of rice. You can find this in the produce section of some grocery stores, with the frozen vegetables, or you can pulse cauliflower in the food processor until it is about the size of rice. If needed press the cauliflower with paper towels to remove excess water. 

Then mix in the eggs, cheese, and garlic powder. The mixture will thicken and be 'dough' like.

IMG_3087.JPG

Next line a baking dish with parchment paper and transfer the dough to the pan. 

IMG_3089.JPG

Then press the 'dough' into the pan and spread it evenly throughout the pan. 

IMG_3090.JPG

Bake it for 25 - 30 minutes, until the mixture is golden brown and starts to get crispy. Note: Depending on how much water is in the cauliflower, you may need to bake it longer to get it nice and crispy, if needed, bake longer until the top is golden brown. 

IMG_3091.JPG

Then top with remaining Parmesean cheese and return to the oven until the cheese is melted, about 5 minutes. 

Then cool and slice into sticks and they are ready to enjoy! 

Then cool and slice into sticks and they are ready to enjoy! 


Cheesy Veggie Sticks 

Serves 6 - 8

Ingredients:

4 cups cauliflower, pulsed into the size of rice

1 1/2 cups shredded Parmesan cheese, divided

2 eggs

1 teaspoon garlic powder

optional: sea salt 

Directions:

Preheat the oven to 400 degrees F. 

Mix the cauliflower, 1 cup of the Parmesan cheese, eggs, and garlic powder together. 

Prepare a 9" x 13" baking dish or small sheet pan with parchment paper and transfer the cauliflower mixture to the prepared pan.  

Press the mixture evenly through the pan and bake for 25 -30 minutes or until the top is golden brown. Top with the remaining cheese and return to the oven until the cheese is melted, about 5 minutes. 

Cool and then cut into strips to serve. 

Print Friendly and PDF

Flourless Fudge-Like Brownies

These flourless brownies are very gooey when they are warm, almost like a brownie pudding! Once they are chilled they are thick like fudge! Enjoy them either way!  The best news is that instead of flour these brownies use black beans and zucchi…

These flourless brownies are very gooey when they are warm, almost like a brownie pudding! Once they are chilled they are thick like fudge! Enjoy them either way!  

The best news is that instead of flour these brownies use black beans and zucchini for the base of the batter plus tons of cacao (or cocoa) powder. What I love about cacao powder is that it is rich in antioxidants plus it adds fiber, magnesium, and iron to the brownies. You can find cacao powder in the natural food baking section of the grocery store, at health food stores, or at on-line retailers. 

Flourless Fudge-like Brownies

Serves 9

Ingredients:

1 can black beans (14.5 ounces), drained and rinsed

3 teaspoons egg substitute + 4 tablespoons water*

1/2 cup grated zucchini (1/2 small zucchini)

3 tablespoons coconut oil

1 teaspoon vanilla

1/2 cup raw sugar

3/4 cup cacao powder (cocoa powder)

1/4 teaspoon salt

1 1/2 teaspoons baking powder

*Or use 2 eggs

Directions:

1. Preheat the oven 350 degrees F. Prepare a 9 x 9-inch baking with non-stick cooking spray.

2. In small dish combine the egg substitute and water, whisk to combine.

3. In a food processor combine the black beans and the egg substitute, pulse to combine.

4. Then to the food processor add the grated zucchini, coconut oil, vanilla, raw sugar, cacao powder, salt, and baking powder. Pulse the mixture to combine, the batter should be thick and smooth.

5. Transfer the brownie mixture to the prepared backing dish. Bake for 25 minutes.

Cooking tip: When you remove the brownies from the oven, they will be gooey! You can enjoy them gooey or chill the brownies overnight a very fudge-like brownie. 

Print Friendly and PDF