recipe

#MakeMilkMoments and Holiday Memories

This blog post is in partnership with American Dairy Association North East.

Hot Cocoa Board (Image: Molly Morgan)

Hot Cocoa Board (Image: Molly Morgan)

This is the season for the holiday memories and while this year will be different in many ways, it is a perfect time to revamp favorite traditions and build new holiday memories. A holiday tradition at our house is enjoying a glass of creamy cocoa during celebrations, especially to warm up after playing in the cold.

THE TRADITION

I always have the staples on hand to make a glass of hot cocoa! In fact, I’m not sure the last time I bought a cocoa mix? We always make our own using one of our grandma’s tried and true recipes and it is really quick and easy to make. I really love coming in a few minutes ahead of everyone to get the hot cocoa ready while they finish playing in the snow. One thing I love about the nostaglia of hot cocoa is that making it with milk delivers not only creaminess but nine essential nutrients, including: calcium, protein, B vitamins, and vitamin D. Here is the classic recipe that we enjoy every winter.

Classic Hot Cocoa (Image source: iStock)

Classic Hot Cocoa (Image source: iStock)

Classic Hot Cocoa
Serves 1

Ingredients:
1 cup milk
2 tablespoons cocoa powder
2 - 3 teaspoons sugar
pinch of salt

Directions:

  1. In a small to medium pan (depending on how many servings you are making, warm the milk. Then whisk in cocoa powder, sugar, and salt.

  2. Continue to whisk until smooth and chocolatey. Serve with any toppings you or your family desire!

hot cocoa.jpg

HOT COCOA BOARD

This year to build on the hot cocoa tradition and make new memories, I have gathered supplies to create cocoa boards (See example pictured above) with goodies to stir into the cocoa and enjoy along with it.

What is fun about this is you can switch up what you serve on the board from time to time, and everyone in the family gets to make their own personal cup just the way they like it! While we look for ways to enjoy this extra time indoors together, a hot cocoa board is a new way to mix it up.

Here are some of the goodies that I have picked up to serve on the cocoa board: yogurt covered snowflake shaped pretzels, peppermint puff candies, peppermint sicks, peppermint granola bark, cookie sticks, graham cracker squares, chocolate nonpareils, wafer cookies, and remember the star of the platter - warm milk!

You can adjust what you add to the board depending on how many are enjoying the cocoa and what yo uhave on hand if trips to the store are limited! If time permits, bake your favorite homemade cookies for milk dunking.

COCOA BOMB

With the explosion of the cocoa bomb, I had to check this out! I do have to say that the really fun part about these is that it makes hot cocoa even easier because you can make the cocoa bombs ahead of time. Or even easier still - you can purchase them, if you can find them! To enjoy the hot cocoa bomb, all you have to do is place it in a mug and pour in warm milk - watch the ball disolve into a mug of creamy hot chocolate.

I can definitley see cocoa bombs becoming a new staple and winter tradition at our house. Of course, you can serve up the cocoa bombs with the cocoa board goodies too!

Wishing you and yours a wonderful holiday season during this crazy time! And hope you can make your own milk moments to create new holiday memories with your family.


WHAT ARE YOUR MILK MOMENTS? SHARE THEM AND ENTER TO WIN PRIZES, INCLUDING A GRAND PRIZE OF $500, SEE THE DETAILS BELOW.


ENTER TO WIN: From now through January 3, 2021, post a special “milk moment” photo, video or short description on Twitter or Instagram highlighting your their family enjoys milk. Include the hashtag #MakeMilkMoments and American Dairy Association North East’s Twitter or Instagram handle, @AmericanDairyNE. The winning entry will receive a grand prize of $500 plus a nostalgic gift basket complete with classic board games, an instant camera, and more. For more information, visit AmericanDairy.com/makemilkmoments .

Print Friendly and PDF

Chocolate Chip Cookie Bar

Healthy eating is all about balance so why not celebrate National Cookie Day? This is a go-to chocolate chip cookie bars recipe that we love ot make, they are so delicious! And they even are gluten free.

You could swap out the gluten free flour for whole wheat pastry flour instead if you rather. As far as flour suggestions, we love Bob’s Red Mill 1:1 Gluten Free Baking flour or Bob’s Red Mill Whole Wheat Pastry Flour. Report back if you make the recipe! HAPPY NATIONAL COOKIE DAY!

Chocolate Chip Cookie Bars (Image Source: iStock)

Chocolate Chip Cookie Bars (Image Source: iStock)

Gluten Free Chocolate Chip Cookie Bars

Serves 20


Ingredients:
2 ¼ cups gluten-free baking flour
1 teaspoon baking soda
1 teaspoon salt
1 cup butter, softened
¾ cup granulated sugar
¾ cup brown sugar
1 teaspoon vanilla extract (gluten-free)
2 eggs
1 package chocolate chips (gluten-free)


Directions:

1.       Preheat the oven to 375 degrees F.

2.       Prepare a 9” x 13” pan with non-stick cooking spray.

3.       In a small bowl combine the flour, baking soda, salt, and vanilla.

4.       In a mixing bowl combine the butter, sugars, and vanilla. Beat with mixer to combine. Add-in the 2 eggs and whip with mixer to combine.

5.       Stir in the chocolate chips.

6.       Transfer the batter (it will be thick) to the prepared ban.

7.       Bake for 20 – 25 minutes until the top is golden brown.

Print Friendly and PDF

Grilled Vegetable & Chicken Alfredo

Grilled Chicken and Vegetable Alfredo (Image Source: Molly Morgan)

Grilled Chicken and Vegetable Alfredo (Image Source: Molly Morgan)

Grilled Vegetable & Chicken Alfredo

Serves 4

Ingredients:
1 red bell pepper, cut into thick slices/pieces
1 yellow bell pepper, cut into thick slices/pieces
1 sweet onion, cut into thick slices/pieces
1 cup baby carrots, cut in half
2 chicken breasts, grilled and cut into strips
½ pound whole wheat pasta, cooked
2 tablespoons butter
2 tablespoons all-purpose flour
2 cups milk
½ cup parmesan cheese shredded
Sea salt
Pepper


Directions:

1.       Preheat the grill and add the sliced vegetables to a grill basket. Grill the vegetables over medium heat for 25 – 30 minutes, until the vegetables are charred and tender. Grill the chicken until the chicken is cooked through and reaches and internal temperature of 165 degrees F.

Or roast the vegetables and chicken: place the vegetables and chicken on a sheet pan, drizzle lightly with olive oil and roast at 425 degrees F for 30 - 40 minutes until the vegetables are tender and the chicken is cooked through.

2.       In a sauce pan melt the butter. Once the butter is melted, stir in the flour. After the flour is well combined, add in the milk. Stir with wire whisk throughout, until the sauce starts to bubble evenly. Then cook for 1 minute more to thicken. Remove from heat and stir in the shredded Parmesan cheese and season with sea salt and pepper.

3.       Serve the grilled vegetables and chicken over cooked pasta and divide sauce among plates. Top with additional Parmesan cheese, if desired.

Nutrition facts (per serving): 490 calories, 13 grams fat, 7 grams saturated fat, 0 grams trans fat, 70 milligrams choleterol, 360 milligrams sodium, 62 grams carbohydrates, 3 grams fiber, 6 grams sugar, 33 grams protein

Print Friendly and PDF

Creamy Tomato Soup

Creamy Tomato Soup (Image Source: iStock)

Creamy Tomato Soup (Image Source: iStock)

Creamy Tomato Soup
Serves 4

Ingredients:
1 tablespoon butter
1 tablespoon all-purpose flour
2 cloves garlic, peeled and minced
1 1/2 teaspoons garlic powder
1 cup low fat milk
3 cups canned tomatoes (with juice)

Directions:

  1. Melt the butter in a medium-size soup pot over medium heat. Once the butter has melted, whisk in the flour. Then whisk in the garlic and garlic powder.

  2. Add the milk and whisk frequently until the mixture is bubbly, about 5 minutes. Cook for 1 minutes more, or until the sauce thickens.

  3. Add the tomatoes to the sauce and cook for 7 - 10 minutes, or until heated through.

  4. Using an immersion blender, puree the soup until it is smooth OR puree in a blender or food processor until smooth. (Note: If using a blender remove the center piece from the top of the blender and cover with a cloth, since the pressure can cause the top to fly off and make a huge mess!). Serve the soup at once.

Nutriiton Facts (per serving): 110 calories, 4 grams fat, 2 grams saturated fat, 0 grams trans fat, 10 milligrams cholesterol, 70 milligrams sodium, 12 grams carbohydrates, 2 grams fiber, 3 grams sugar, 4 grams protein

Print Friendly and PDF

DIY Queso Dip

DIY Queso Dip (Image Source: iStock)

DIY Queso Dip (Image Source: iStock)

DIY Queso Dip
Serves 10

Ingredients:
2 tablespoons butter
2 tablespoons all-purpose flour
2 cups low fat milk
6 slices American cheese
1/2 cup cheddar cheese, shredded
1/4 cup salsa
2 teaspoons hot sauce*
Salt and pepper

*Adjust to your spice preference

Directions:

  1. In a saucepan, melt butter and then add in the flour and whisk together. Once combined add the milk and whisk, continue to cook over medium heat, whisking throughout.

  2. Once the mixture starts to bubble, let it boil one additional minute. Then remove it from the heat, add the sliced cheese and shredded cheese. Once the cheese is melted, stir in the salsa, hot sauce, salt, and pepper.

Serve with whole grain tortilla chips and your favorite taco toppings like black beans, shredded lettuce, chopped tomato, sliced olives, and diced onion.

Nutrition Facts (per serving): 130 calories, 9 grams fat, 6 grams saturated fat, 0 grams trans fat, 25 milligrams cholesterol, 250 milligrams sodium, 5 grams carbohydrates, 0 grams fiber, 0 grams sugar, 7 grams protein

Print Friendly and PDF

Breakfast Solution: Yogurt or Smoothie Bowls

Yogurt Bowls (Image Source: iStock)

Yogurt Bowls (Image Source: iStock)

A yogurt or smoothie bowl for breakfast can be simple, delicious, and with endless ways to switch them up, you won’t get bored!

To get started: For a yogurt bowl, simply begin with a base of your favorite yogurt! Or for a smoothie bowl, start with your favorite smoothie recipe.

When it comes to selecting a yogurt to use as the base of your yogurt bowl or smoothie - a go to brand of yogurt (actually skyr) that I love is siggi’s. What is great about siggi’s is that it is very creamy because it is strained and does not have much added sugar! Plus I love that siggi’s has five different live and active cultures , to deliver a diverse mix of probiotics to support gut health. Also in their product line-up siggi’s has a line of plant-based options that are coconut-based and have about 10 grams of protein from pea protein, which is 3 x more protein than other plant-based yogurt options.

While I have enjoyed this brand of yogurt for several years and recently, I was recently sent a delivery of siggi’s yogurt samples and many of those samples turned into yogurt and smoothie bowls (some were enjoyed just as is!). Check out some favorite smoothie bowl recipes below!

Next pick your toppings!

Some favorite toppings include: granola, blueberries, sliced banana, fresh mango cubes, dried fruit, sliced strawberries, chia seeds, a drizzle of honey, almonds, cashews, pistachios, shredded coconut, and peanut butter.

Then arrange the toppings of your choice on your yogurt or smoothie bowl and enjoy!

Tropical Yogurt Bowl (Image Source: iStock)

Tropical Yogurt Bowl (Image Source: iStock)

Tropical Smoothie Bowl

Ingredients:
1 container of siggi’s mango plant-based
1 cup frozen mango or pineapple
1/4 cup 100% orange juice
toppings: blueberries, shredded coconut, fresh mango, banana, and granola

Directions:

  1. In a blender combine siggi’s mango plant-based yogurt, frozen fruit and juice. The mixture will be thick! Add additional water or juice to thin more, if desired.

  2. Transfer the smoothie to a bowl and top with blueberries, coconut, mango, banana, and granola. Or get creative and pair this smoothie with the toppings of your choice.

Nutrition facts (per serving): 400 calories, 12 grams fat, 8 grams saturated fat, 0 grams trans fat, 0 milligrams cholesterol, 15 milligrams sodium, 65 grams carbohydrates, 6 grams fiber, 38 grams sugar, 13 grams protein

Chocolate Peanut Smoothie Bowl

Chocolate Peanut Smoothie Bowl

Chocolate Banana Smoothie Bowl
Serves 1

Ingredients:
1 container siggi’s vanilla skyr
1 frozen banana (peel removed)
1 tablespoon cocoa powder
1 /2 cup 1% milk
Toppings: peanuts, shredded coconut, chocolate chips or cocoa nibs, sliced fresh banana

Directions:

  1. In a blender combine the vanilla siggi’s, frozen banana, cocoa powder, and milk. Blend until icy and smooth. Mixture will be thick - if needed, thin with additional milk. Transfer to a bowl.

  2. Top the smoothie with peanuts, coconut, chocolate chips, and fresh banana slices. Serve immediately! Enjoy!

Nutrition facts (per serving): 430 calories, 11 grams fat, 4 grams saturated fat, 0 grams trans fat, 15 milligrams cholesterol, 120 milligrams sodium, 65 grams carbohydrates, 6 grams fiber, 35 grams sugar, 26 grams protein

THANK YOU siggi’s for sharing the product samples! For more about siggi’s check out their website: https://siggis.com/

Print Friendly and PDF

Tennessee Mule

One of my favorite adult holiday drinks is a Tennessee Mule - ginger beer with bourbon! The recipe is simple a mix of Crabbie’s Ginger Beer and lightened up with club soda or seltzer. Cheers!

Tennessee Mule (Image Source: iStock)

Tennessee Mule (Image Source: iStock)

Tennessee Mule
Serves 2

Ingredients:
1 bottle of Crabbies Ginger Beer
1 lime, cut into quarters
2 ounces bourbon
4+ ounces club soda or Poland Springs Peach Ginger Seltzer*
Ice

*Peach Ginger Seltzer is a 2020 Poland Springs holiday seltzer flavor

Directions:
1. In each glass muddle 2 slices of lime with 1 ounce of bourbon. Add 1/2 bottle of ginger beer.

2. Fill the glass of choice with ice and add 1/2 bottle (about 5.5 ounces of ginger beer). Top with each glass with club soda or seltzer.

Cheers!

Nutrition Facts (per serving): 165 calories, 0 grams fat, 0 grams saturated fat, 0 grams trans fat, 0 milligrams cholesterol, 0 milligrams sodium, 12 grams carbohydrates, 0 grams fiber, 0 grams sugar, 0 grams protein

Print Friendly and PDF

Fall Squash Soup

Peanut Squash - Photo Source: iStock

Peanut Squash - Photo Source: iStock

This soup is perfect for fall! The best part is that you can use a variety of squash like peanut squash (aka honey nut), butternut, acorn, delicata, etc. In fact, the last batch of this soup that I made I used a mix of peanut and delicata and it tasted delicious.

Butternut Squash Soup
Makes 6 to 8 servings

Ingredients:
7 cups of squash cubes*, any variety (about 2 1/2 pounds of squash)
3 tablespoons unsalted butter, divided
2 - 3 leeks, white and light green parts only, quartered lengthwise, sliced thin, (about 1 1/2 cups)
Salt and pepper
1 tablespoon flour or gluten-free flour of choice
4 cups low sodium vegetable broth or low-sodium chicken broth
1 to 2 cups water
Pinch of cayenne pepper or dash of red hot

*To prepare squash cubes - slice squash in half and remove seeds. Peel skin and cut into 1 - 2 inch cubes.

Directions:
1. Roast the squash until tender (about 45 minutes) at 375 degrees Fahrenheit.
2. Melt 2 tablespoons of butter in a large soup pot over medium-high heat. Add the 1 cup of the sliced leek and cook, stirring occasionally until lightly browned. Then add the roasted squash and cook until the squash begin to break down about, 10 to 13 minutes.
3. Add 2 cups broth and mix to combine. Add remaining 2 cups broth, 1 cup water, and cayenne pepper.
4. Working in batches, process soup in blender until smooth, 1 to 2 minutes. Return soup to pot and bring to a boil and then simmer for 10 minute or more. If desired, thin with up to 1 cup water to desired consistency. Season with salt and pepper to taste.
5. Toss the remaining 1/2 cup of leeks with 1 - 2 tablespoons of flour to lightly coat. In a small skillet melt 1 tablespoon of butter and add the leeks. Cook until lightly browned.

Serve the soup garnished with the crispy leeks.

Nutrition Facts (per serving): 165 calories, 6 grams fat, 4 grams saturated fat, 0 grams trans fat, 15 milligrams cholesterol, 400 milligrams sodium, 27 grams carbohydrates, 4 grams fiber, 6 grams sugar, 4 grams protein

Print Friendly and PDF

Two Cauliflower Product Reviews

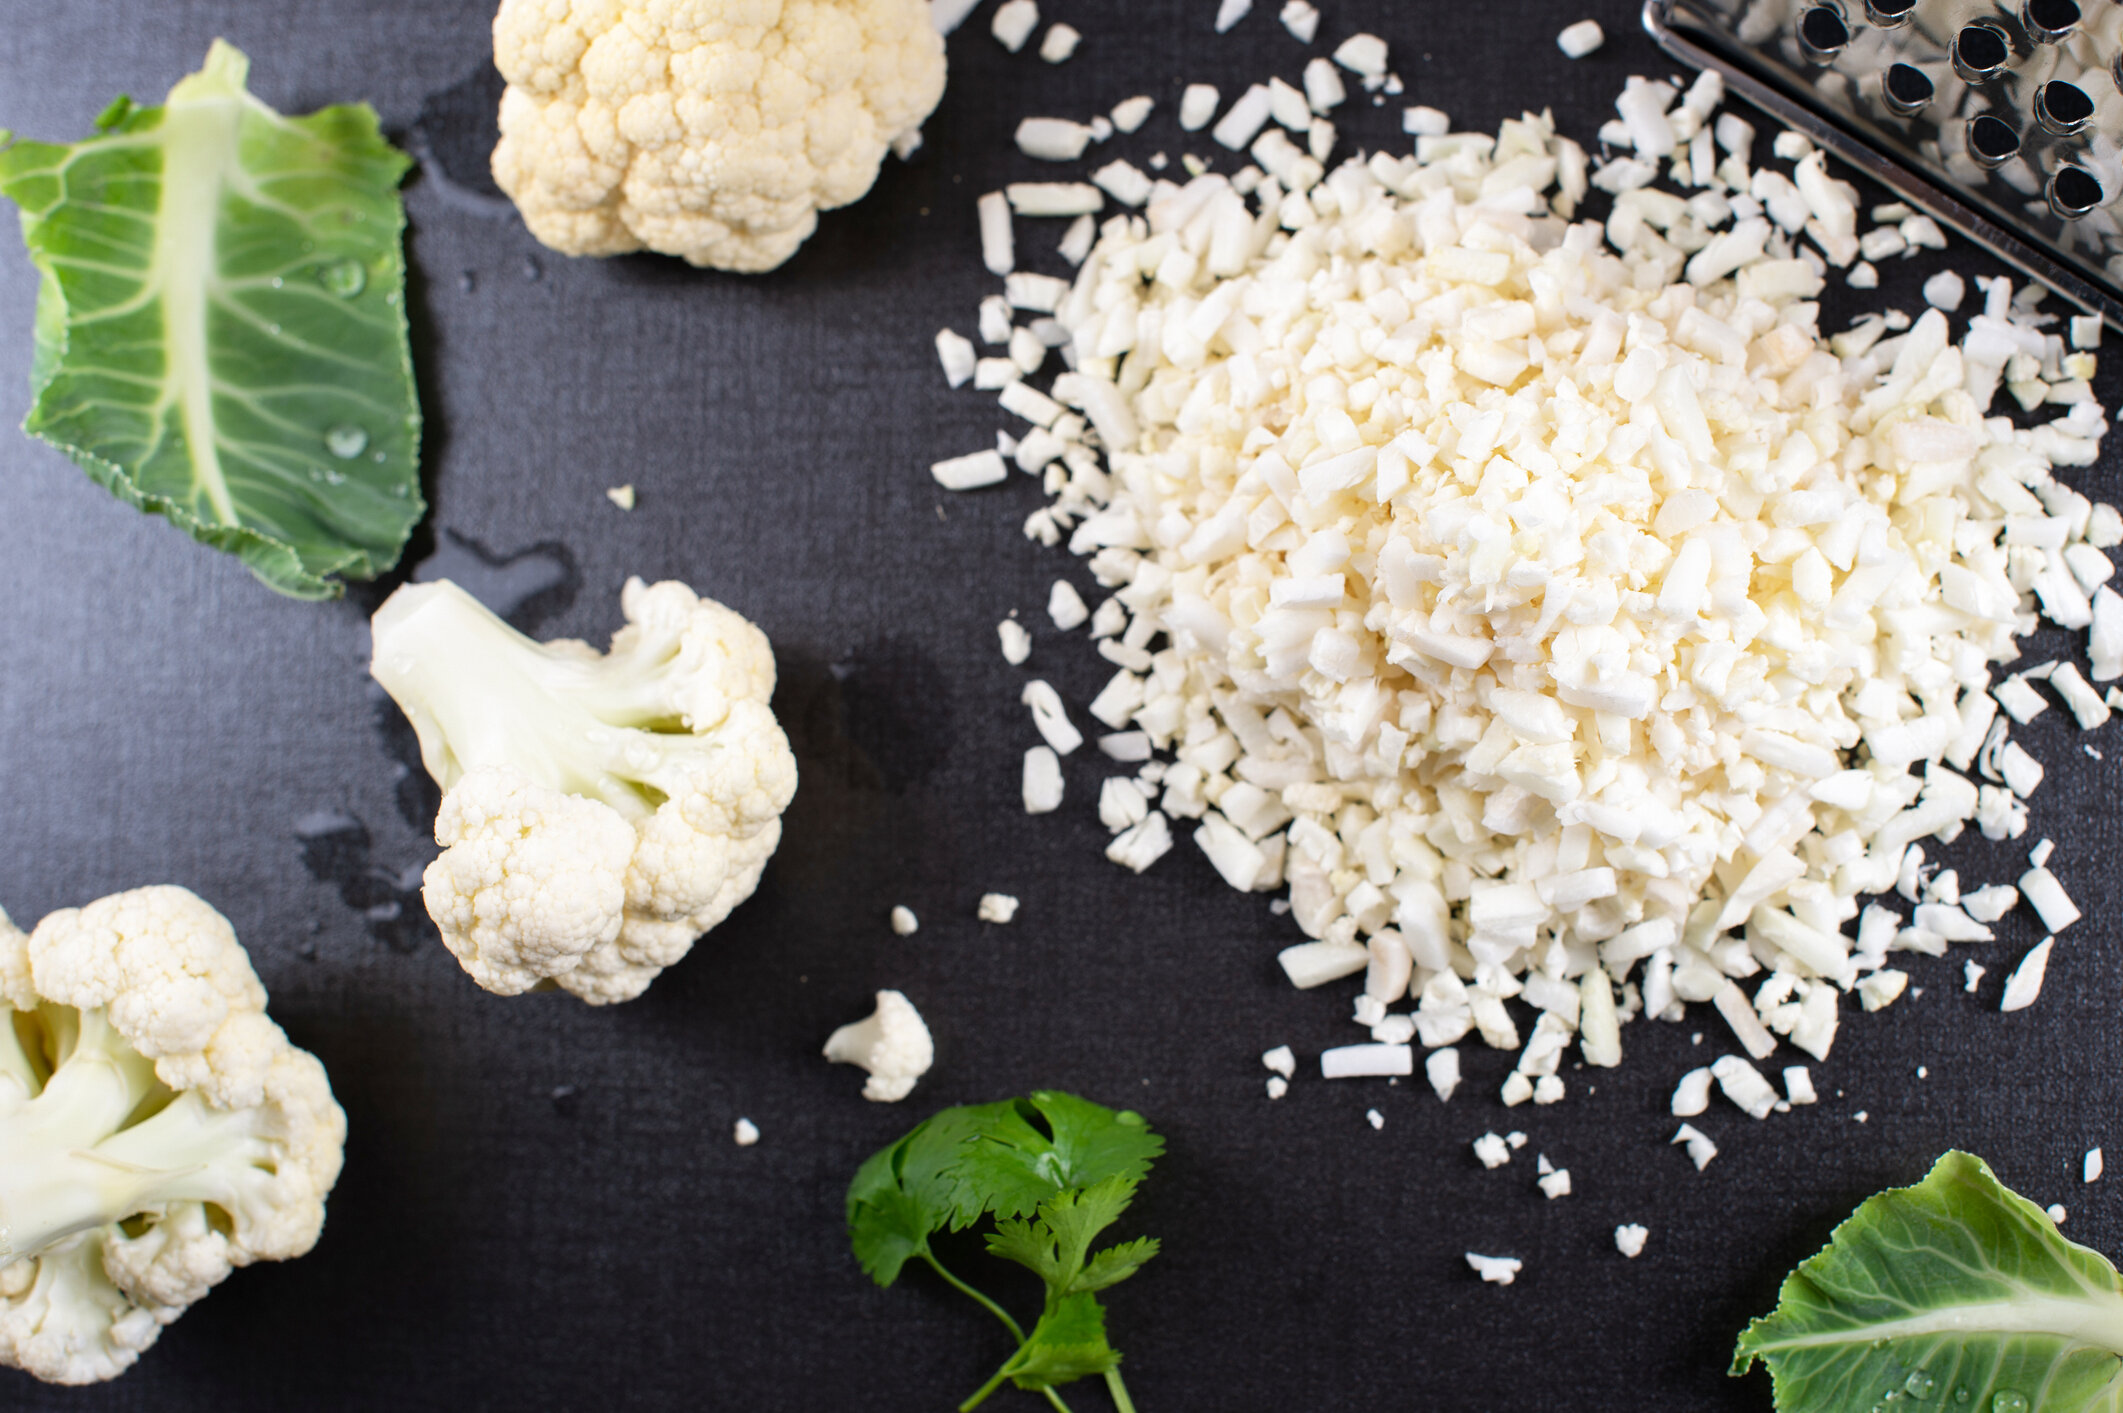
Cauliflower Rice (Image Source: Getty Images)

Cauliflower Rice (Image Source: Getty Images)

There are a lot of great cauliflower-based products in the freezer section of the grocery store! A bonus is that they are quick and easy to prepare and a way to add-in more vegetables to your meals.

And if you love cauliflower, check out this Roasted Cauliflower Hummus recipe too, click here.

IMG_5177.jpeg

CAULIFLOWER GNOCCHI

These cauliflower-based gnocchi from Green Giant are SO delicious! They are made with 40-percent cauliflower. Per serving they have 5 grams of fiber and 8 grams of protein. You can use the gnocchi as a side dish at a meal or as the base for a main dish. They cook up in boiling water in just a matter of 2 - 3 minutes!

For a protein boost, serve with grilled chicken or your favorite protein.

Pictured here, the gnocchi were served with a garden-fresh quick tomato sauce (See recipe below).

IMG_4809.jpg

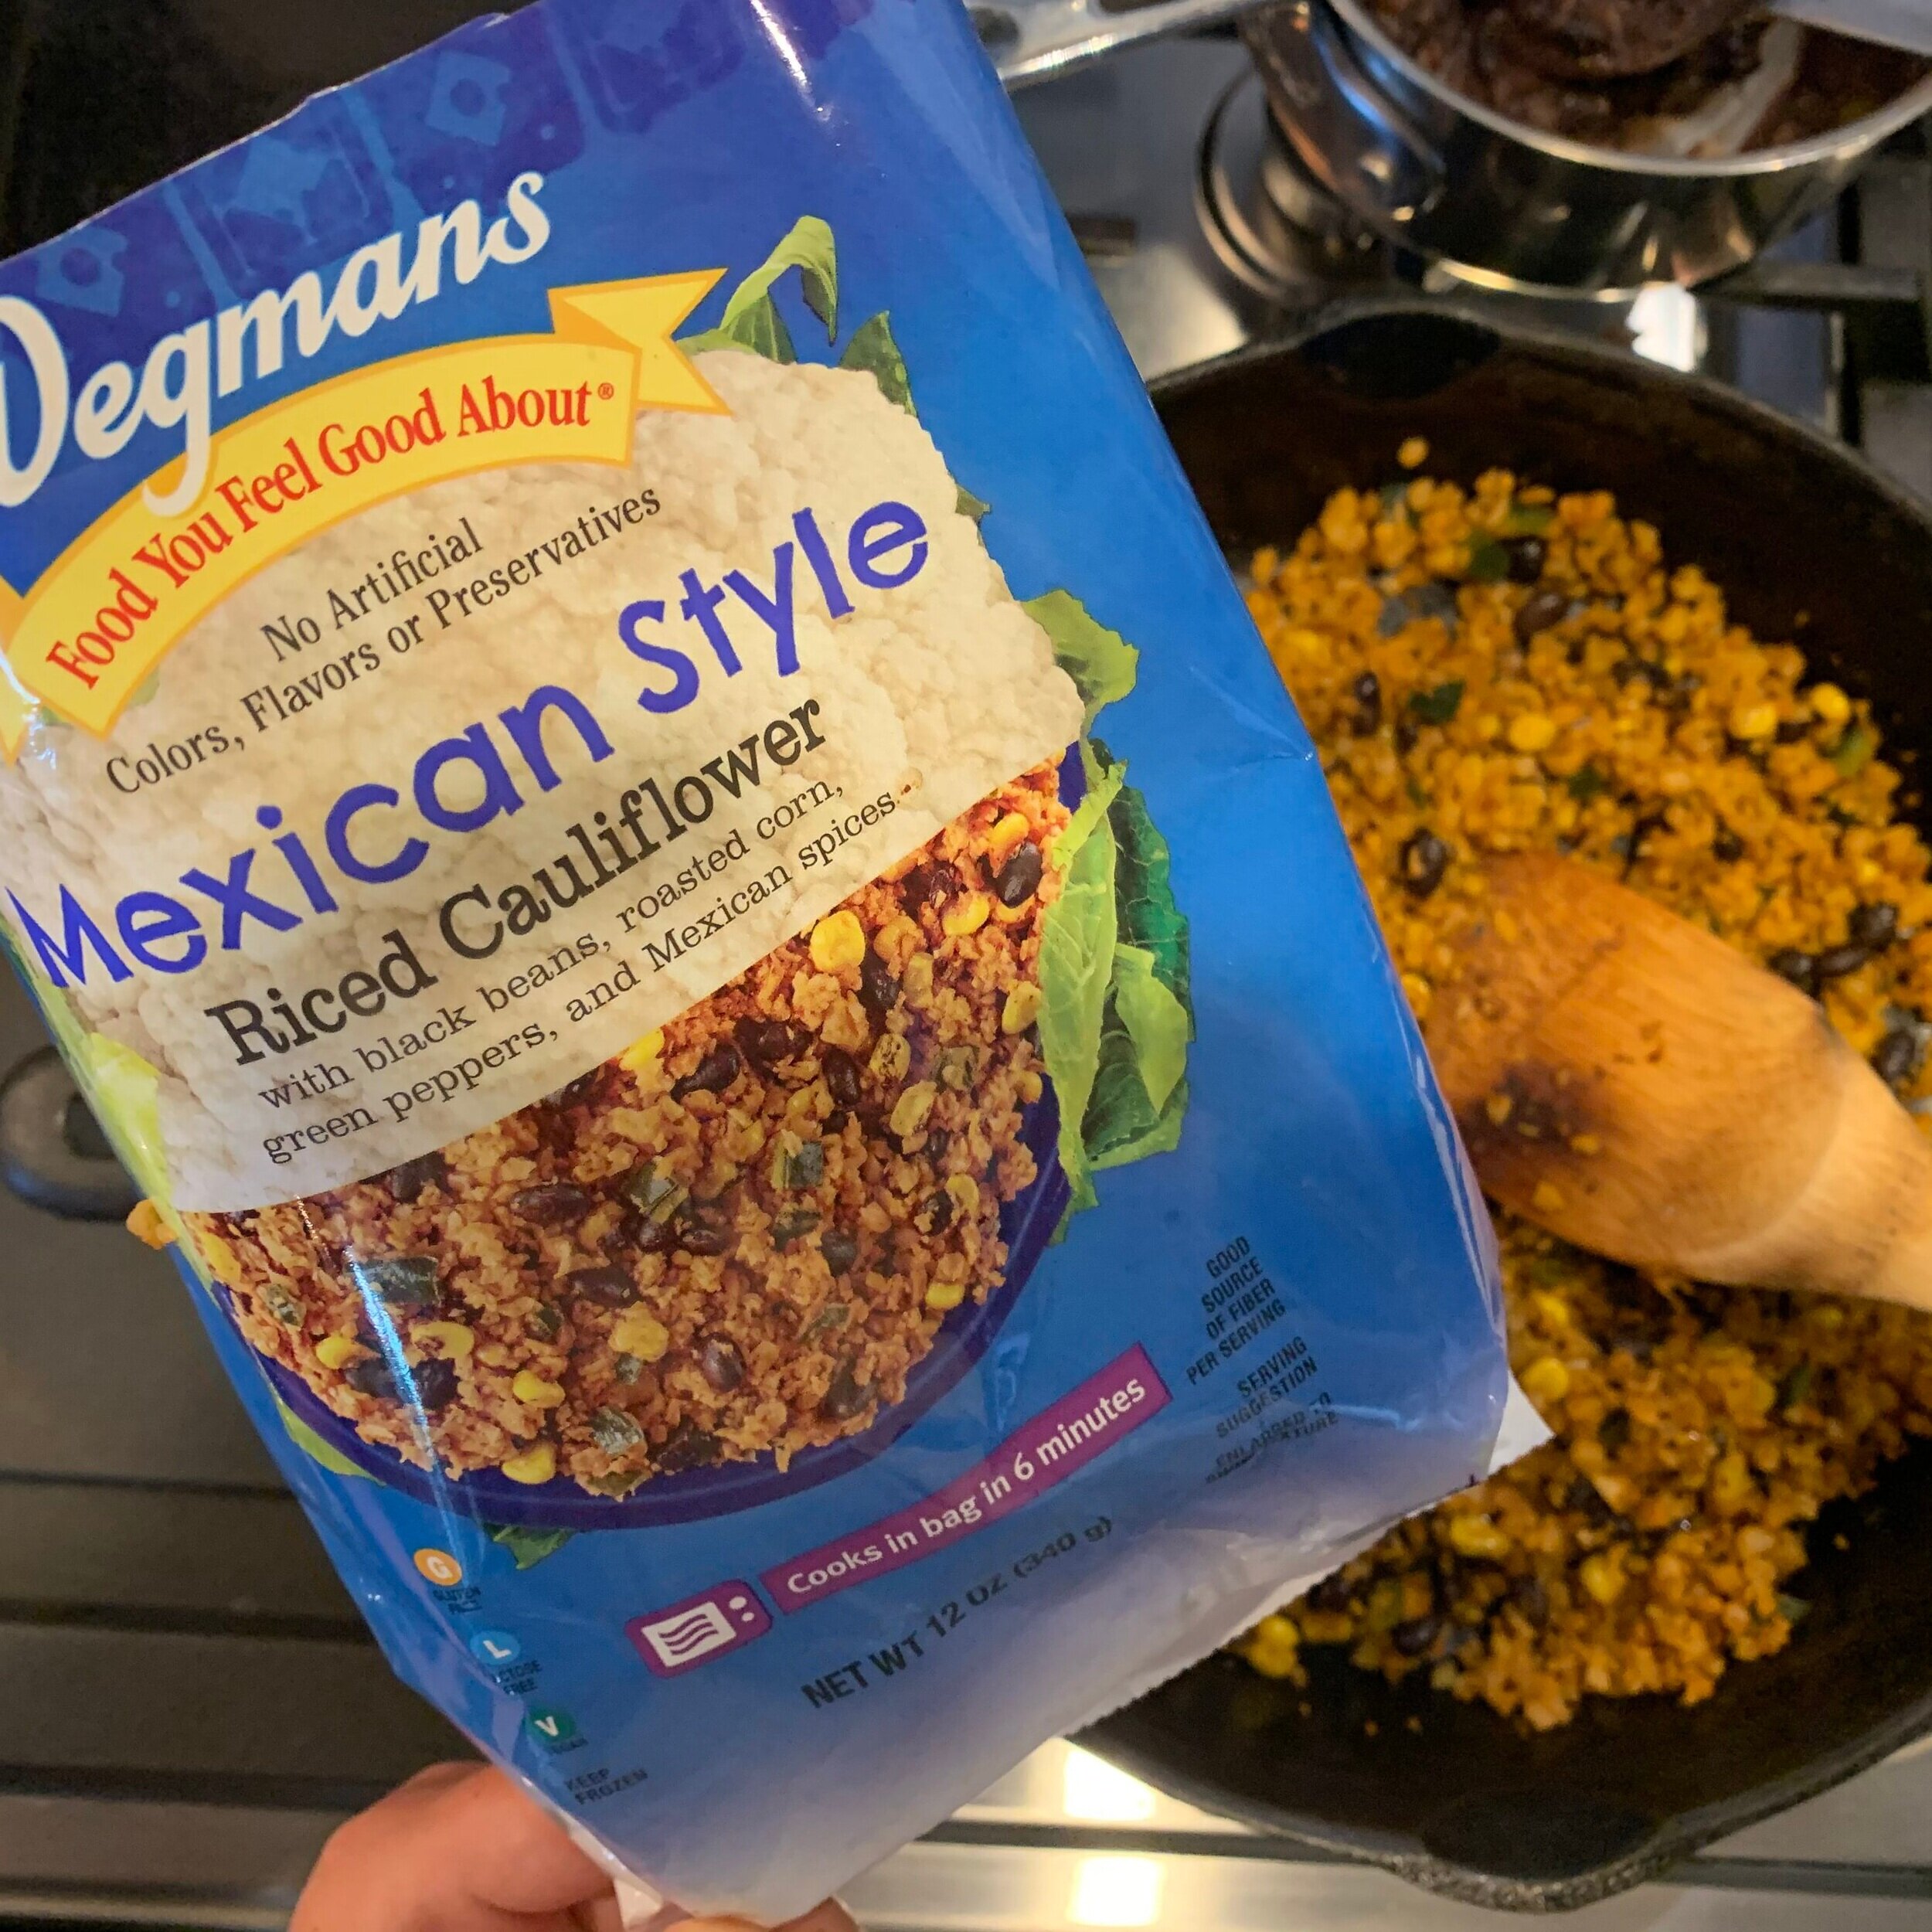
MEXICAN RICE

This cauliflower-rice dish is so simple and easy from Wegmans. The cauliflower rice is tossed with corn, green peppers, Mexican spices, and black beans. It is gluten-free. Each serving has only 60 calories and has 3 grams of fiber and 2 grams of protein. This goes great as a taco or burrito filling or even as the base for a “rice” bowl.

To heat it up, you can microwave it or just prepare it in a skillet with some olive or coconut oil.

This is also available in a Asian Style and a Garlic & Herb at Wegmans in the freezer section of the store.

Garden-Fresh Quick Tomato Sauce
Serves 4

Ingredients:
1 tablespoon olive oil
1/2 sweet onion, diced
6 roma or small tomatoes, seeds removed and chopped
3 cloves of garlic, minced
1/4 cup white wine
1 teaspoon dried oregano (or 1 tablespoon fresh oregano)
1 tablespoon butter or plant-based spread

Directions:

  1. In a skillet heat the olive oil, add the onion, tomatoes, and garlic. Cook down for 10 - 15 minutes until the tomatoes are tender and the onions and garlic are softened. Add the white wine and oregano. Bring to a boil and then simmer for 5 - 10 minutes.

  2. Finish with the butter or plant-based butter spread. Once melted, stir to combine. Then toss the sauce with pasta or gnocchi of your choice.

Print Friendly and PDF

Creamy Pasta Primavera

This delicious summer dish is so tasty! The pasta that is used is Banza chickpea based pasta which helps to boost the protein content of this dish. While chickpea pasta is a little pricey for the fiber and protein boost that you gain, it is definitely worth a try.

Now for the cheesy flavor… this dish gains it’s cheesy flavor from nutritional yeast which also brings along nutrition benefits because it is loaded with B-vitamins and adds protein too! You can purchase nutritional yeast in the ‘health food’ section of grocery stores or from on-line retailers like Amazon, click here for a link to purchase Nutritional Yeast from Amazon.

So if you haven’t guessed already, this recipe is vegan! If you think you won’t like vegan meals, this recipe could change your mind. Report back if you give it a try or even share a photo with Molly on social media (Instagram: @mollymorganrd, Twitter: @mollymorganrd, or Facebook!

The idea for this recipe came from Food and Wine Magazine!

Creamy Pasta Primavera - Photo: Molly Morgan

Creamy Pasta Primavera - Photo: Molly Morgan

Creamy Pasta Primavera
Serves 6

Ingredients:
3 tablespoons olive oil, divided
1 small sweet onion, chopped
3 tablespoons garlic, minced
1 cup unsweetened cashew milk
2/3 cup cashews, soaked in 1 cup water and drained*
5 tablespoons nutritional yeast, divided
1 teaspoon sea salt, divided
1/2 teaspoon black pepper
1/2 cup whole wheat panko breadcrumbs
5 medium multicolored carrots, sliced
1 medium zucchini, chopped
1 cup frozen green peas, thawed
8 ounces Banza Rotini Pasta (or whole wheat pasta)

*Soak the cashews in water for at least 1 hour to soften

Directions:
1. Prepare pasta to package instructions and drain, reserving 1/2 cup of pasta cooking water.
2. Place zucchini and carrots on sheet pan, drizzle with one tablespoon of the olive oil, and roast at 425 degrees Fahrenheit for 20 minutes until roasted and lightly browned.
3. In skillet add one tablespoon of the olive oil and chopped onion, and two tablespoons of garlic. Cook over medium heat for 10 minutes, stirring often.
4. In a blender combine the cashew milk, drained cashews, three tablespoons of the nutrition yeast, 1/2 teaspoon of the salt, and pepper. Pulse until smooth. Set aside.
5. In a small skillet add remaining one tablespoon olive oil with the panko breadcrumbs, two tablespoons nutritional yeast, and one tablespoon garlic. Cook for about two minutes until panko is crispy and lightly toasted.
6. Return the pasta to the pot, add the roasted vegetables, peas, pasta cooking liquid, and sauce. Season with remaining salt. Serve topped with the panko mixture.

Nutrition Facts (per serving): 450 calories, 18 grams fat, 3 grams saturated fat, 0 milligrams cholesterol, 550 milligrams sodium, 58 grams carbohydrates, 10 grams fiber, 9 grams sugar, and 23 grams protein

Print Friendly and PDF